English
Español
English
Español
There are four main areas you'll need to set up, to make sure your content is displayed correctly in two languages. The theme itself doesn't come with translations (as we couldn't possibly cater for all the languages, regions and combinations!), so the theme gives you the power to set your translations for every piece of text in your Shop. Here's how.
Under Theme Settings > Bilingual, you can enter all the individual pieces of text that appear throughout your store. This includes things like "Next", "Add to Cart", "Account" and so on.
The first thing to do is give your two languages a name:

Note: If you only want to use the theme for one language, just uncheck "use language 2", and forget about the translations.
Next, fill out each of the translations using a pipe character to separate the languages, like this:
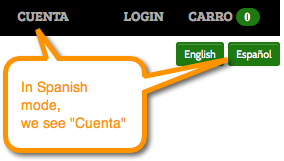
This would show "Account" when in English mode, and "Cuenta" when in Spanish mode. (Can't find the pipe character?)

Fill all of these text snippets out and Step 1 is complete. This helps our screen look like this:


Go to Admin > Navigation, and you will see your menus.
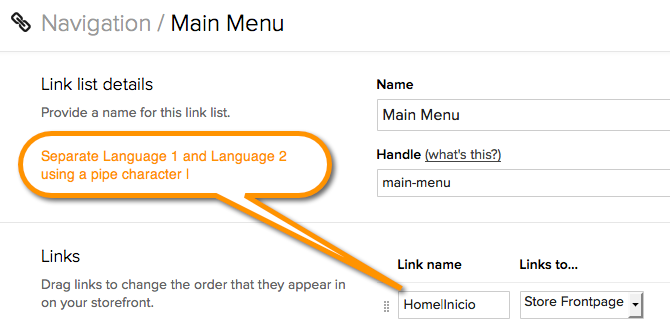
To show these in two languages, we use the same technique as in the previous step - use the pipe character to separate language 1 and language 2.
For "Home", for example, we would enter it as below, into the text box in your navigation. This will show "Home" in English mode and "Inicio" in Spanish mode.

To see an example of all the menus on this demonstration store, so you can copy the structure, click here.
Do this for anywhere you see a text box in Shopify: Product titles, menus / navigation, tags, and so on.
We need to wrap a <div> tag around each language's content in a product or page. This is much easier than it sounds, and only involves some copy and pasting.
 button to switch over to HTML view.
<div>#lang1:
<p> English content goes here.</p>
</div>
<div>#lang2:
<p> Spanish content goes here. Maybe with some <strong>bold text</strong></p>
</div>
You can use this technique wherever you see the text editor: pages, product descriptions, and blog articles.
Example:

Because of limitations in Shopify, we're not able to switch languages in checkout. Instead, we'll enter the TWO languages for each piece of text. This needs to be done manually via Settings > Checkout > Checkout language. There's no way to show only *one* language in the checkout, so we need to set it up with both. It's good practice to separate them with a slash.


We realise this is not the optimal way of translating the checkout. It would be nice to be able to show only the one language. However, until Shopify allows us to control the checkout process, this is the best we can do. We do feel this is still an intuitive experience, as customers can still see their language.
You can apply these same techniques throughout all aspects of your store: using the pipe character to separate anything in a text box, and the <div> tags for any on-page content you type into a text editor.
Video coming soon.
Note: For Tab Headings, you'll need an additional pipe character at the START and END of the title.
Tab 1 language 1 content goes here
Tab 1 language 2 content goes here
Tab 2 language 1 content goes here
Tab 2 language 2 content goes here
Tab 3 language 1 content goes here
Tab 3 language 2 content goes here
Here's the code you need:
CLICK HERE TO OPEN, COPY & MODIFY CODE FOR HORIZONTAL TABS>
Language 1 content goes here.
Language 2 content goes here.
Language 1 content goes here.
Language 2 content goes here.
Here's the code you need:
CLICK HERE TO OPEN, COPY & MODIFY CODE FOR VERTICAL TABS >
Use the same code as "Vertical Tabs" above.
To create a drop-down menu, first decide on your structure and which menu items should have a drop-down menu. For example: If your main menu is "Home, Products, About Us", you may decide to have "Products" with a drop-down menu and several categories underneath.
To do this, you need to go to Admin > Navigation and create a new Link List with the same name as the menu item you want to have in your drop-down menu.
If you are creating a bilingual drop-down menu, you must name your menus in one language first, then save, then go back and add the second language.
Example: If we want to create a drop-down menu for "Products":


This is also the same method you would use to create nested sidebar menus (expand/collapse).
The final step is to add the sidebar menu to your sidebar. To do this go to your Theme Settings and find the 'Sidebar' section.

Select your sidebar menu from the dropdown and then 'Save'.